With a little help from @bluetooth_mdw I now have a remote control for the @4tronix_uk #bitbot pic.twitter.com/oYushM2gYW
— Barry Byford (@uk_baz) April 2, 2017
Martin Woolley has written a great little app for controlling a micro:bit controlled buggy and I wondered if it could be used for driving the bit:bit from 4tronix. After a brief exchange of messages with Martin it became clear that there is nothing that needs to be changed in the app to be used with different robots, it is just the code on the micro:bit that needs to change.
This allows you to use the correct pin numbers for your robot but also change what the buttons do on the Bitty Software controller.
Martin has documented how he had done it for the original buggy:
![]()
There is an App for Android and iOS that can be downloaded from:
[Note: Since this page was originally created Bitty Software discontinued the free app and now only offer a paid for app. Some background on the decision is on their blog]
https://play.google.com/store/apps/details?id=com.bittysoftware.bittycontroller
https://itunes.apple.com/gb/app/bitty-game-controller/id1263034695
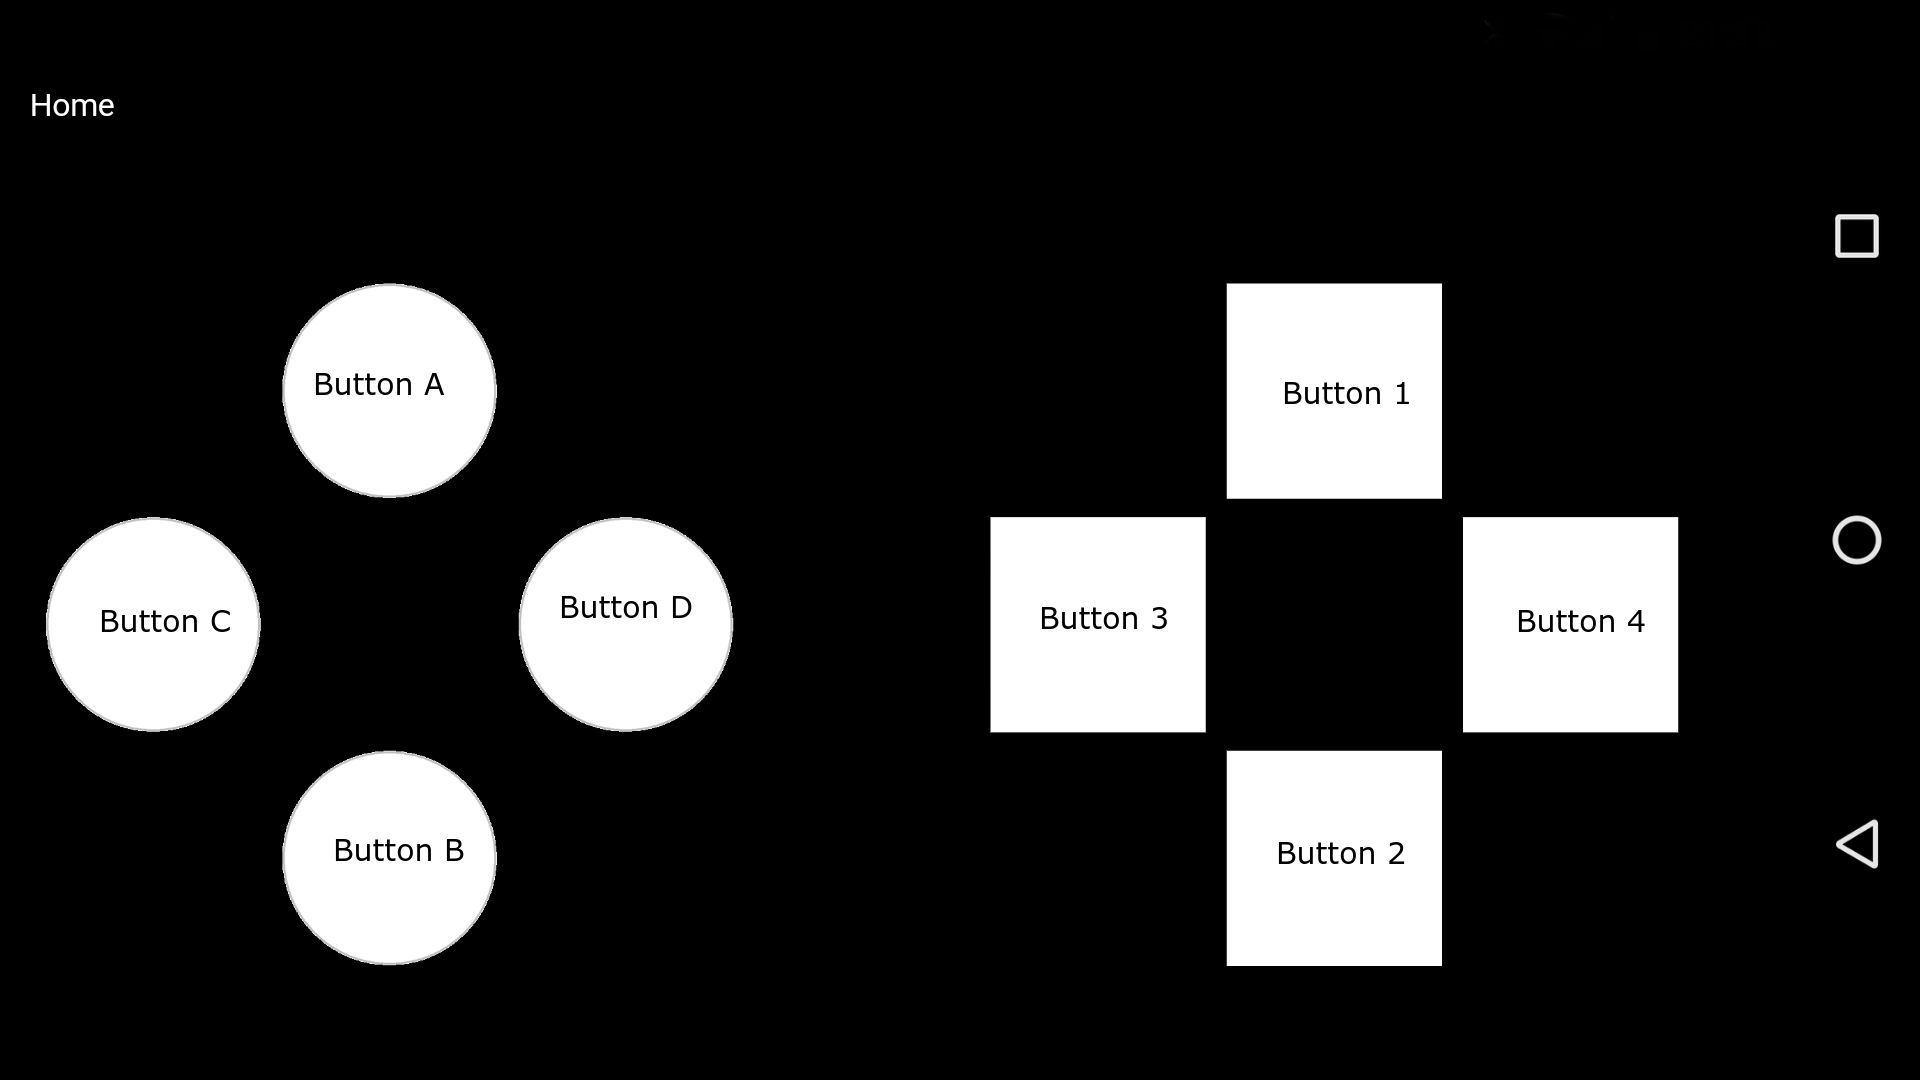
Below is a screen grab of what the app looks like. I’ve annotated it with the names used in PXT to refer to the buttons:
The code for the micro:bit can be done with C++ or with PXT. I choose to go with the PXT editor.
The app works by sending ‘events’ to the micro:bit. We have to write code for the micro:bit to interpret those events and make the correct things happen.
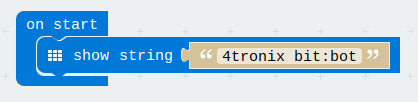
It is always nice to have a message display on startup so you know you have the correct program loaded up. E.g.
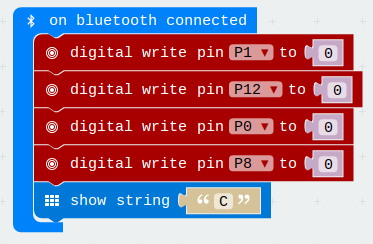
Set pins to a known state and display a message so you know the connection has been successful
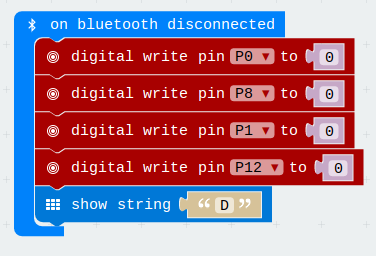
When we disconnect then make sure everything is off and send a message to the user
We can capture when buttons are pressed and released. We will make the buzzer turn on when button 4 is pressed and turn off when button 4 is released.
When button 4 is pressed we do an analog write to pin 14 to make the buzzer sound.
We are going to code up that when button A is pressed we will move forward and when it is released the robot will stop. This is not the only way of doing it but a nice straight forward way for this tutorial.
To move forward we need to set pins 1 and 0 high while pins 12 and 8 are low. We do this when the button A is pressed and all pins are low when the button is released.
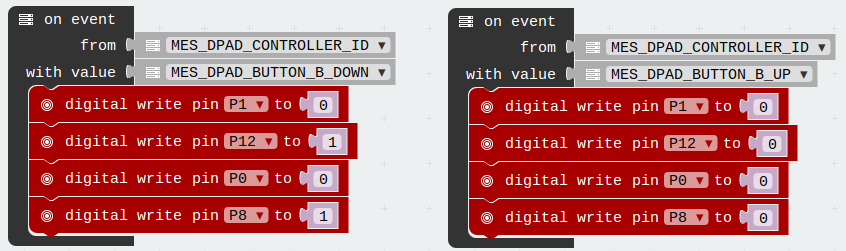
Button B is going to move the robot backwards and to do this we reverse which pins are high. This means that pins 12 and 8 are high. Same as last time, to stop the robot on releasing the button we set all pins to low.
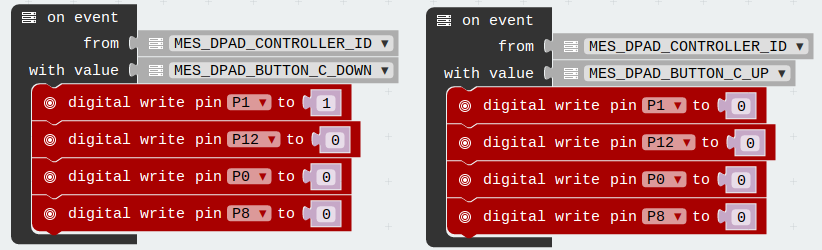
Button C is going to make the robot spin left. We do this by making only the right motor move forwards.
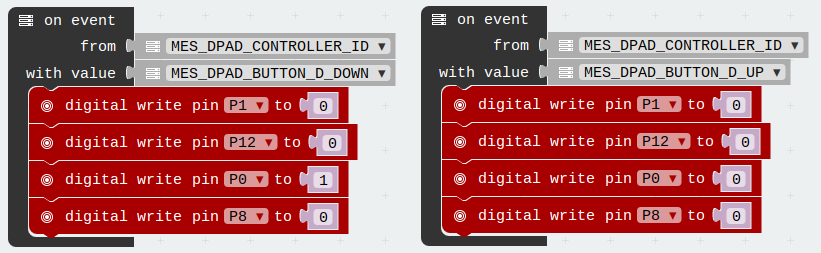
Finally button D is going to spin the robot right and we do this by just rotating the left motor forwards.
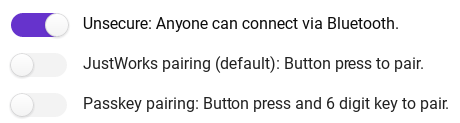
We are going to change the default project settings so that we don't need to pair our phone with the micro:bit:
There are a number of ways that this solution could be improved. We could improve the logic so that a couple buttons could be used along with sending analog values to the pins. This would allow better steering etc.